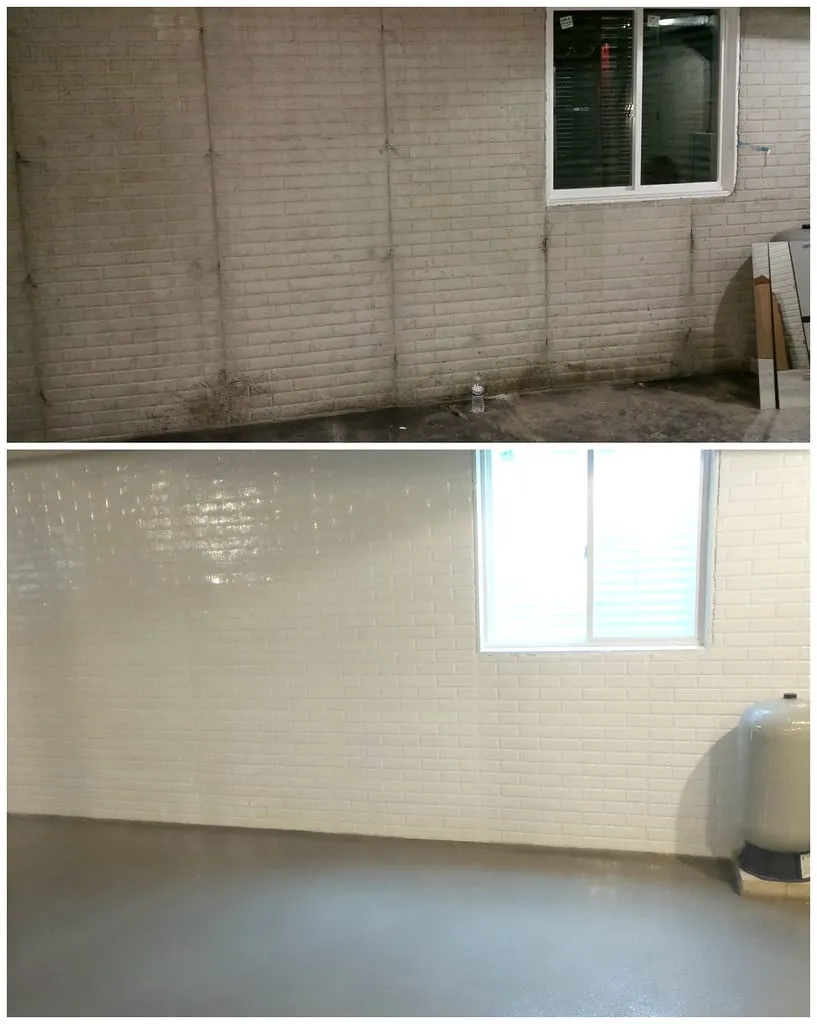
Key Takeaways
- Basement waterproofing before finishing means diagnosing where water actually enters (condensation, seepage through the wall, or a rising water table) before spending a dollar on framing, since each cause has a different fix and the wrong one just hides the problem.
- Weeping tile condition, sump pump sizing with a backup, and any active crack all get dealt with before insulation goes up, because every one of them is far cheaper to fix through an open wall than through finished drywall.
- The insulation assembly has to let the concrete wall dry to the interior. A wall that can't dry, sealed behind the wrong materials, grows mold inside the cavity even when the water problem itself was fixed correctly.
Why this has to happen before framing, not after
A basement renovation fails in one of two ways. Either the water problem was never actually solved, or it was solved on the wrong side of the wall for what the site needed. Both look identical for the first year: new flooring, painted walls, a rec room that seems fine. What's different is the first spring after a heavy thaw, or the first summer humid enough to sweat a cold concrete wall, when water that was never dealt with finds the new materials, by then behind drywall and inside stud cavities where nobody can see it starting.
Our complete guide to basement renovations in Ontario covers the whole project end to end, layout, permits, ceiling height, the suite-versus-family-space decision. This post is the one piece of that project that has to be settled first, because everything downstream of it, insulation, framing, drywall, gets built on top of whatever the water is doing.
Finding out where the water is actually coming from
Not every damp basement has the same problem, and the fix depends entirely on which one it is.
Condensation shows up as moisture on the inside face of the wall, usually worse in summer, when warm humid air meets a concrete surface still cold from the ground behind it. It's uniform across the wall rather than tracking to one source, and it responds to dehumidification, not waterproofing.
Seepage through the wall looks different: a stain or damp patch tracking back to a specific crack, a tie-rod hole, or the cove joint where wall meets floor. This is water actively moving through the concrete, which means the wall's own waterproofing, or the lack of it, is the actual problem.
A rising water table or hydrostatic pressure is the most serious of the three, water pushing against the foundation hard enough to force its way through the concrete's own pores, not just through a visible crack. It often shows up coming up through the cove joint or a floor drain rather than down a wall, and it's the condition that decides whether interior drainage alone is enough or the exterior needs work too.
Efflorescence, the white, chalky residue left after water evaporates from concrete, is a reliable sign water has moved through the wall at some point, even if it looks dry the day you're checking. Worth investigating before painting over it, not brushing off.
Interior versus exterior waterproofing: the real tradeoff
Once you know where the water's coming from, the next decision is which side of the wall to fix it from, and the two options trade off very differently on cost and disruption.
Exterior waterproofing means excavating around the foundation to the footing, applying a membrane or coating to the outside of the wall, and often replacing weeping tile at the same time. It addresses water before it reaches the concrete, the more complete fix, but it means digging up landscaping and anything else against that wall, and it's only possible where there's room to excavate. That's a real constraint on a tight lot: a basement renovation in Oakville, where setbacks can be narrow in the older town south of Dundas Street, sometimes rules out exterior work on a side before the water diagnosis even factors in.
Interior waterproofing works from inside: a drainage channel along the base of the wall, tied into a sump pump, collects water entering through the wall or cove joint and moves it out before it reaches the finished space. It's less disruptive and generally less expensive, with no excavation, but it manages water rather than stopping it from reaching the concrete, which matters if the wall's mortar joints or block cores are actively deteriorating rather than just letting moisture through.
Neither is automatically right. Isolated seepage with no structural concern is usually a good candidate for an interior system. Real hydrostatic pressure, or failing exterior parging with the block itself breaking down, is where exterior work earns the disruption, because an interior drain just manages a problem that keeps worsening behind it.
Weeping tile: what condition it's in, and when it needs replacing
Weeping tile is the perforated pipe laid at footing level around the foundation's perimeter, sitting in crushed stone, whose only job is intercepting groundwater before it reaches the wall and carrying it to a sump pit or storm connection. A house where it's still doing its job usually doesn't have a water problem at all. A house with a water problem often has weeping tile that's crushed, disconnected, or silted in after its filter layer failed.
Its condition can't be confirmed from inside the basement, only from an exterior excavation, or inferred from how the site behaves: water showing up at the same spot every heavy rain says something about the footing. That's part of why the interior-versus-exterior decision above matters. An interior drain can manage the symptom for years without replacing the system that was supposed to keep water away from the wall in the first place.
Soil changes how much this matters. A basement renovation in Guelph usually means digging through layered clay, silt, and sand left by glaciation before hitting the limestone and dolomite underneath, ground that sheds water slower than open sand and keeps aging weeping tile under more sustained pressure. A basement renovation in Kitchener sits on the sand and gravel of the Waterloo Moraine instead, generally more forgiving for drainage, though bearing and drainage conditions still vary lot to lot.
Sump pump sizing, and why a backup isn't optional
A sump pump undersized for the water actually arriving at the pit runs constantly and still loses to a heavy storm. Sizing depends on the pit's inflow rate, not the basement's square footage, which is why a pump swapped in without checking that inflow is a common source of a "new pump, same flooding" call.
The bigger gap we see isn't pump capacity, it's backup. A sump pump is an electrical appliance, and the storms most likely to overwhelm a basement are also the storms most likely to knock out power. A battery backup pump takes over automatically when the primary loses power, running off a deep-cycle battery for several hours depending on load. A water-powered backup ejects water through a venturi using municipal water pressure instead of electricity, which survives an outage but depends on the municipal supply staying pressurized, and some municipalities restrict it because it draws on that supply during the exact storms everyone else is drawing on it too. Either backup is worth having before drywall goes up around a system nobody wants to reopen a finished wall to service.
Sealing the crack: injection, and what it actually fixes
A crack in a poured concrete wall, especially one actively letting water through, gets sealed by injection rather than surface patching, which does nothing for water moving through the wall's full depth. Epoxy injection bonds rigidly and restores some of the wall's original strength, the right call for a stable crack. Polyurethane stays flexible after curing, suited to a crack still shifting with the seasons, since a rigid repair on a moving crack tends to crack again beside itself. The American Concrete Institute's guidance on crack evaluation and repair frames the choice this way, matching material to whether the crack is still active.
Injection fixes the crack itself, not a wall where cracking is a symptom of something larger, like differential settlement from a footing problem. A crack that reappears in the same spot after a proper injection is usually telling you the cause was never addressed, not that the repair failed.
Vapour and capillary control, above and below the slab
Concrete is porous, and moisture moves through it by capillary action from the damp ground below even without a visible crack. Two details handle this, both needed before the interior finish goes on. Under the slab, a polyethylene vapour barrier, laid on the compacted base before pouring, or over an existing slab before new flooring in a renovation, stops ground moisture wicking up into the finished space. Against the wall, a capillary break between the concrete and the wall assembly keeps that same moisture out of the wood framing and drywall built against it.
Skipping either doesn't cause an obvious leak. It causes a slow, even dampness that shows up as a musty smell or soft flooring months later, by which point it's a demolition job rather than a step that took five minutes during construction.
Insulation assembly order: the wall still has to dry
An Ontario basement wall goes through real seasonal moisture cycling even after every leak is fixed, some moisture reaches the concrete from the soil side no matter what, and the wall assembly built against it has to accommodate that rather than trap it. Insulation and any vapour-impermeable layer go together in a specific order so the wall can dry to the interior when it needs to, instead of getting sealed on both sides with moisture already inside. Framing tight against a wall that's still wet, or still receiving water from an unfixed crack or weeping tile issue, buries that moisture inside a cavity it can quietly damage for months before anyone notices a smell, which is exactly why getting the wall dry comes first. What happens if moisture management goes wrong after the basement is finished, humidity targets, dehumidification, and where condensation forms inside a finished wall, is covered in our guide to preventing mold and moisture in a finished basement.
Radon: a separate reason to test before finishing
Radon is a naturally occurring radioactive gas that seeps up from the ground through cracks, gaps around pipes, and sump pits, and it has nothing to do with visible water. Health Canada's guideline for radon in indoor air is 200 becquerels per cubic metre, averaged over a year, in the lowest level of the house that's actually lived in, which includes a finished basement meant as a bedroom or family room. Above that guideline, remediation is recommended, sooner the higher the reading.
A radon mitigation system, typically a sealed pipe drawing from beneath the slab to a fan venting above the roofline, is far simpler to route through an unfinished basement than to retrofit through finished walls and ceiling later. A test kit is inexpensive and the result takes weeks, enough time to fold mitigation into the renovation plan if the number comes back high, rather than opening up a finished basement later to add one.
Exterior grading still matters, even for an interior fix
Even a well-built interior system works less hard when the site outside does its share. Grading that slopes toward the foundation, or a downspout dumping at the wall, keeps feeding water to the same spot regardless of what's managing it inside. We cover that site-level half, slope, swales, and downspout and sump discharge routing, in grading and drainage around a new patio, since the same principles apply to any hard surface or landscaping change near a foundation.
Matching the symptom to the fix
| What you're seeing | What's likely happening | What actually fixes it |
|---|---|---|
| Uniform dampness on the wall, worse in summer | Condensation from humid air meeting cold concrete | Dehumidification, not waterproofing |
| A stain tracking back to one crack or the cove joint | Localized seepage through the wall | Crack injection, or an interior drain at that section |
| Water rising through the floor or cove joint after heavy rain | Hydrostatic pressure from a high water table | Interior drainage tied to a properly sized sump, or exterior work if the wall itself is failing |
| White, chalky residue on the wall | Past water movement through the concrete | Investigate the source before finishing over it |
| Musty smell with no visible water | Vapour or capillary moisture with no vapour barrier | Vapour barrier under the slab and a capillary break at the wall |
| A crack reopening after a prior repair | The underlying movement was never addressed | Diagnose the cause, not just re-inject the same crack |
Frequently asked questions
Do I need to waterproof a basement that's never had a visible leak?
No history of water is a lower-risk starting point, but "no visible leak" isn't "no moisture movement." Check the wall for efflorescence, check where the yard slopes, and confirm the sump pit has an outlet before finishing over a wall you're assuming is dry.
Is interior waterproofing as good as exterior?
For managing water that's already through the wall, yes. It doesn't stop water reaching the concrete in the first place, which matters more where the wall itself, the mortar joints or block, is deteriorating rather than just letting moisture through a sound wall.
How do I know if my sump pump is the right size?
Sizing depends on how fast water fills the pit during heavy rain, not the basement's square footage. A pump cycling constantly through a storm instead of keeping pace is undersized for that pit's inflow, whatever its listed horsepower.
Can I finish a basement before fixing a small crack?
No. Even a hairline crack that isn't leaking yet is a path for water and, separately, for soil gas including radon. Injecting it while the wall is still exposed costs a fraction of the same repair once framing and drywall are in the way.
Bottom line
Basement waterproofing before finishing comes down to one sequence: find where the water is coming from, fix that cause from whichever side of the wall suits the site, confirm the sump pump and weeping tile can handle what the site sends them, then build an insulation assembly that lets the wall keep drying afterward. Skip that order and the renovation still looks finished for a while. It isn't, and the part that got skipped is exactly what nobody sees again until it's already a bigger job than it needed to be.