Key Takeaways
- Tile is not waterproof. Grout lines let water through by design, so the waterproofing layer underneath the tile, not the tile itself, is what keeps a shower from leaking into the subfloor and the ceiling below.
- There are two membrane approaches: sheet membrane (bonded with thinset, like Schluter-KERDI) and liquid-applied membrane (rolled or trowelled on, like RedGard or Hydro Ban). Both meet the same performance standard when installed correctly. Most documented failures on either system trace back to installation, not the product.
- The Ontario Building Code sets the floor here, not the finish line. Article 7.2.2.3 requires a shower receptor built so water can't leak through the walls or floor, and Article 9.29.10.4 requires moisture-resistant backing under tile. But neither article specifies a membrane brand, a flood test, or a slope percentage. A contractor following the membrane manufacturer's own installation spec is building to a tighter standard than code minimum requires.
- Before tile goes down is the only point where a waterproofing problem is cheap to fix. Once it's tiled over, everyone assumes it was done right, because there's no way left to look at it.
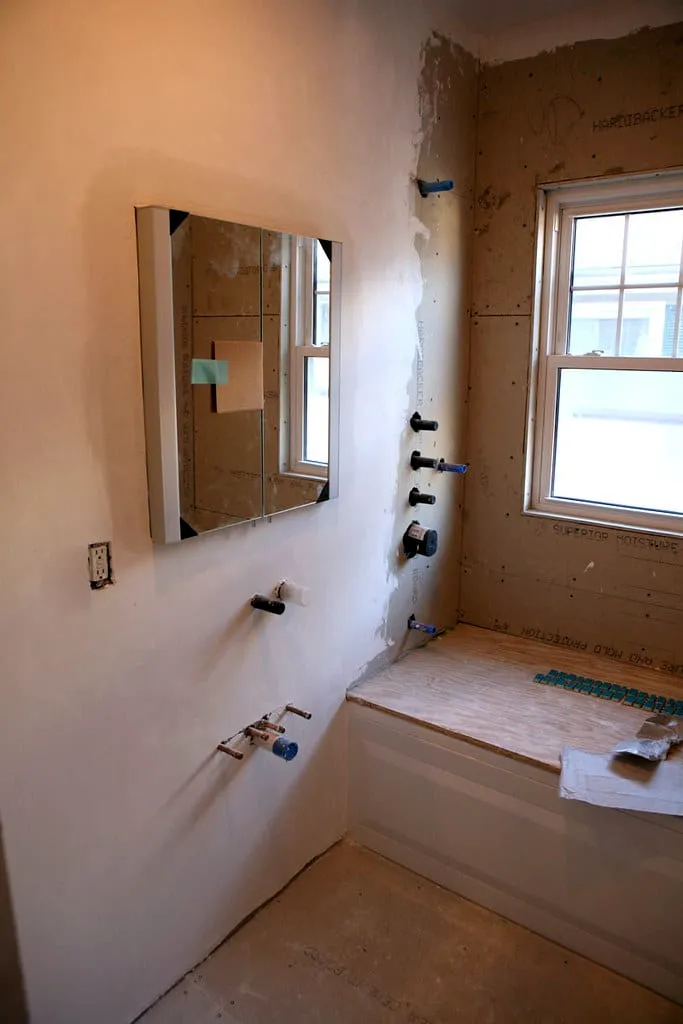
Waterproofing is the one part of a bathroom renovation you never see finished. It goes in, then tile covers it for good. Done right, you never think about it again. Done wrong, you might not find out for two or three years, when a stain shows up on the ceiling below or the subfloor starts to feel soft underfoot. By then, the membrane isn't the repair. The whole shower is.
This post is the technical companion to our bathroom renovation timeline, week by week. That post covers where waterproofing sits in the overall schedule: after rough plumbing, before tile, with a full cure required before anyone stands in the shower. Here, we go deeper into the two membrane systems, the slope math, the actual code language, and the specific questions worth asking a contractor before that step gets covered up for good.
Why the part nobody sees is the part that matters most
Water damage is one of the most common and expensive categories of home insurance claims in North America. In the US, Insurance Information Institute data puts water damage at roughly one in five home insurance claims, with an average claim cost in the thousands of dollars (Insurance Information Institute data, cited via EMC Security, retrieved 2026-09-03). Canadian insurers don't publish a directly comparable national breakdown. But the pattern on the ground matches what we see on renovation walkthroughs. A slow leak behind tile is far more common than the dramatic burst-pipe flood people picture, and it's far more expensive to fix the longer it goes unnoticed.
Bathrooms are a disproportionate source of that category, for a structural reason. It's the one room in the house where the finished floor and three walls get deliberately, repeatedly soaked. The waterproofing has to work at every seam, corner, curb, drain, and pipe penetration, not just across a flat plane. Waterproofing defects consistently show up as one of the most common categories of building defect claims in jurisdictions that track this closely. Construction-defect research in New South Wales, Australia found waterproofing present in 42 percent of surveyed apartment buildings that already had a serious defect on file (The Good Builder, defect data analysis, retrieved 2026-09-03). That's not an Ontario number, and we're not claiming otherwise. But it lines up with what every experienced tile setter already knows. The membrane is where corners get cut, because it's the one layer nobody, including the homeowner writing the cheque, ever gets to inspect once the job is done.
What we see on site: On walkthroughs before a bathroom renovation in Waterloo or when we're pricing out bathroom renovation costs in Cambridge, the waterproofing step gets the most explanation of anything on the walkthrough. That's because it's the step a homeowner can least verify for themselves later. Once tile is set, there's no non-destructive way to check whether the membrane underneath is continuous, correctly lapped at the corners, and actually bonded rather than just sitting there.
Two membrane systems: sheet vs. liquid-applied
Every modern shower waterproofing system falls into one of two families. Both are designed to meet the same ANSI A118.10 performance standard for load-bearing, bonded waterproof membranes used under tile. That standard is the industry benchmark referenced by manufacturers and tile-setting standards on both sides of the border, even though Canada doesn't publish its own separate tile-membrane standard.
Sheet membrane is a thin, waterproof polyethylene or fabric sheet, and Schluter-KERDI is the best-known brand. It gets embedded into a bed of thinset mortar and lapped over itself at seams and corners, the way you'd overlap shingles. It also comes pre-formed for niches, curbs, and drains as part of a matched system. That matters because the corners and penetrations, the places waterproofing actually fails, get built from factory parts designed to fit each other rather than field-improvised.
Liquid-applied membrane is a paintable or roller-applied elastomeric coating that cures into a seamless waterproof skin, and RedGard and Hydro Ban are the common names. It's faster to apply over irregular shapes, and it skips the pattern-cutting a sheet membrane needs around plumbing penetrations. But it depends entirely on getting the wet-film thickness right. Most manufacturers specify two coats at a minimum combined dry thickness, and the installer has to actually measure that rather than eyeball it. Under-application is a well-documented cause of liquid-membrane failure, and it's invisible once the second coat has dried.
| Sheet membrane (e.g. Schluter-KERDI) | Liquid-applied (e.g. RedGard, Hydro Ban) | |
|---|---|---|
| Application | Embedded in thinset, sheet by sheet | Rolled or brushed on in coats |
| Corners and curbs | Pre-formed matched components | Built up by hand, reinforced with fabric tape |
| Biggest failure point | Unbonded or unlapped seams | Under-thickness coats |
| Speed on irregular shapes | Slower, more cutting | Faster |
| Verification before tile | Visual seam and lap check | Wet-film thickness gauge reading |
Neither system is objectively "better" waterproofing once installed correctly. The real difference is which failure mode a given crew is more likely to avoid. A crew that does high volume with a matched sheet system tends to get very consistent results, because the parts are designed not to be misassembled. A crew that's careful with a wet-film thickness gauge gets equally reliable results from a liquid system, and can move faster around an odd-shaped niche or bench. Ask which system your contractor uses by default and why, not just whether the wall is "waterproofed."
Shower pan slope: the 2 percent that keeps water off the mortar bed
A shower floor that doesn't drain properly doesn't fail because water gets in. Water always gets in; that's what a drain is for. It fails because water sits on top of the waterproofing membrane instead of running off it. Standing water finds every pinhole, every incomplete seam, and every weak spot in the membrane far faster than moving water does.
The Ontario Building Code doesn't spell out a shower-specific slope percentage in plain numbers. But two related provisions set the expectation. Article 7.2.2.3 requires that "shower receptors shall be constructed and arranged so that water cannot leak through the walls or floor." Article 7.4.8.1 sets the general minimum slope for small drainage pipes at 1 in 50, or 2 percent, in the direction of flow. That 2 percent figure is also the number tile setters actually build to on the shower floor itself. It's consistent with the roughly 1/4 inch per foot minimum slope referenced across North American tile-setting standards for mortar-bed shower pans (Ceramic Tile Foundation, retrieved 2026-09-03). Too flat, and water pools. Too steep, past about 1/2 inch per foot, and the floor feels uncomfortable to stand on while grout lines wear unevenly underfoot.
Two things go wrong here in practice. The first: a mortar bed sloped correctly at the drain but flat, or even slightly back-pitched, somewhere in the middle. That usually comes from an installer screeding by eye instead of working off a story pole or laser level from a fixed reference point. The second, more common problem: a pre-sloped foam shower pan installed with the drain flange sitting slightly proud or recessed relative to the pan's designed slope. That defeats the pan's engineered pitch, even though the pan itself was correct out of the box. Both problems are invisible from the finished tile, and both leave standing water on the membrane every time the shower runs.
What the Ontario Building Code actually requires, and what it doesn't
It's worth being precise about this, because contractors sometimes wave at "code" as a stand-in for "correct," when code and correct aren't the same floor. The 2024 Ontario Building Code (O. Reg. 163/24) requires, at minimum:
- Article 7.2.2.3 — a shower receptor built so water cannot leak through the walls or floor.
- Article 9.29.2.1 — a waterproof wall finish extending at least 1.8 m up the wall in a shower stall, and at least 1.2 m above the rim of a bathtub with a shower.
- Article 9.29.10.4 — ceramic and plastic tile installed around a bathtub or shower must go over moisture-resistant backing.
- Article 9.29.10.5 — joints between wall tile and a tub or shower must be caulked with a mildew-resistant sealant meeting CAN/CGSB-19.22-M.
What none of those articles specify: which membrane product to use, a minimum flood-test duration, a numeric slope tolerance, or how seams and corners should be detailed. That's deliberate. The Code sets a performance and safety floor for the whole province, not an installation spec for one trade. The tighter, more specific requirements, things like wet-film thickness, seam overlap width, and cure time before flood testing, come from the membrane manufacturer's own installation instructions. A contractor who follows those instructions to the letter is building well above what an inspector actually checks at a rough-in inspection. That's the gap worth understanding: a bathroom can pass inspection and still have a membrane installed to a lower standard than the manufacturer requires for the warranty to stay valid.
What to ask your contractor before tile goes down
Once tile is set, the membrane underneath it stops being something you can verify and becomes something you have to trust. These are the specific questions worth asking while the membrane is still visible, not after:
- Which membrane system, by name, and why that one for this shower. "Waterproof membrane" isn't an answer. "Schluter-KERDI with the matched niche and curb" or "two coats of Hydro Ban at the manufacturer's minimum wet-film thickness" is.
- Has the shower pan been flood tested, and for how long? A flood test means plugging the drain, filling the pan a few centimetres deep, and leaving it, typically 24 hours, before covering it. Not every crew does this by default. Ask for it in writing in the scope of work if it isn't already there.
- How are inside corners and the curb detailed? These are the highest-failure-rate spots on any shower. A matched sheet system uses pre-formed corner pieces; a liquid system needs fabric reinforcing tape embedded at every inside corner and along the curb. Either answer is fine; "we just run the coating around the corner" is not.
- What's the slope at the drain, and was it checked with a level, not eyeballed? A two-minute check with a torpedo level before mortar sets is cheap. Re-sloping a pan after tile is on is not.
- How long before the membrane is tiled over, and does that match the manufacturer's cure time? Rushing this step to hold a schedule is one of the more common shortcuts on a tight renovation timeline. Waterproofing cure time is one of the few steps in that schedule that genuinely can't be compressed.
None of these questions require you to know how to install a membrane yourself. They just require the contractor to have a specific, repeatable answer instead of a reassurance.
Where this fits if you're renovating a bathroom in Ontario
If you're earlier in the planning process, our complete guide to bathroom renovation in Ontario covers the full project from layout and permits through to fixtures and finishes, with waterproofing as one step among many. This post exists because that step deserves more depth than a general overview can give it.
We build to this standard on every wet area we tile. That's true whether it's a full bathroom renovation in Toronto with a curbless walk-in shower, or a more straightforward tub-to-shower conversion in the Kitchener-Waterloo-Cambridge corridor. The membrane system and the brand name matter less than whether the crew treats it as a step with a checklist, flood test included, rather than a step to get past on the way to tile.
Frequently asked questions
Do I need a vapour barrier and a waterproof membrane, or just one?
They solve different problems. A vapour barrier controls moisture vapour moving through a wall assembly over time. A shower membrane stops bulk water, actual liquid, from getting past the tile in the first place. A shower wall needs the waterproof membrane behind the tile regardless. Whether a separate vapour barrier is also needed elsewhere in the wall assembly depends on the wall construction and climate zone. That's a detail worth confirming with whoever is doing your rough-in, not something to assume either way.
Can a bathtub surround skip a membrane if it's a one-piece acrylic unit?
A factory one-piece tub-and-surround unit is its own waterproof shell, so it doesn't need a separate membrane behind it the way a tiled wall does. The moment you're tiling above or around it, though, the tiled section needs the same moisture-resistant backing and, in most cases, the same membrane treatment as a fully tiled shower.
How long does a membrane need to cure before tile goes on?
It depends on the product and the ambient temperature and humidity on site. The manufacturer's data sheet is the actual answer, not a rule of thumb. As a general range, liquid-applied membranes commonly need 24 hours or more between coats and before tiling, and sheet membranes need the thinset bonding them to cure fully first. Rushing this is a cure-time shortcut, not a waterproofing shortcut. But it produces the same result if it fails.